Linux Fundamentals Part 2

Welcome! Yeh hai second part of the reworked “Linux Fundamentals” series. Is part mein hum first part mein seekhi gayi knowledge ka use karenge, isliye strongly recommend kiya jata hai ki pehle pehla room complete kar lo, phir hi aage badho.

Part 2 mein hum browser ke andar wale terminal ko chhod kar ek aur important skill seekhne wale hain โ€” remote machines ke terminals ko login aur control karna. Ye Linux ka ek basic aur fundamental skill hai.

Is room mein tum ye sab karna seekhoge:

๐Ÿ”น Apni pehli kuch commands ko aur powerful banana โ€” by learning how to use flags and arguments
๐Ÿ”น Filesystem ka aur deep understanding โ€” jaise kaise files ko copy aur move kiya jata hai
๐Ÿ”น Kaise files aur folders ka access manage hota hai, aur kaise check karein ki humein kisi cheez ka access hai ya nahi
๐Ÿ”น Apne pehle scripts aur executables ko run karna!


Excited? Toh chalo shuru karte hain Part 2 โ€” aur Linux ki understanding ko next level pe le jaate hain!
Agar kisi step mein dikkat ho, toh poochhna mat bhoolna.ย 

Linux Fundamentals Part 1 mein humne in-browser functionality ka use kiya tha taaki tum bina kisi problem ke directly apni pehli Linux machine se connect ho sako.

Waise, jo browser-based terminal tha usme jo technology use hui thi โ€” wohi protocol hum aaj bhi use karne wale hain. Is protocol ka naam hai Secure Shell, ya short form mein SSH. Yeh ek common tareeka hai kisi remote Linux machine ke command line se connect hone aur uske saath interact karne ka.


Is room mein hum do machines deploy karenge:

    1. Tumhari Linux Machine

    2. TryHackMe AttackBox


SSH Kya Hai Aur Kaise Kaam Karta Hai?

Secure Shell (SSH) ek encrypted protocol hai jo do devices ke beech secure communication ke liye use hota hai.

Jab hum terminal mein koi command likhte hain (human-readable format mein), to woh cryptography ka use karke encrypt ho jaati hai โ€” taaki jab woh network ke through remote machine tak travel kare, to secure rahe. Remote machine tak pahunchne ke baad, woh data decrypt ho jaata hai โ€” jisse woh samajh sake ki user ne kya command bheji hai.

Neeche wale diagram mein iska simple flow dikhaya gaya hai.

Tum TryHackMe ke ek alag room mein different types of encryption ke baare mein detail mein padh sakte ho.Lekin abhi ke liye sirf itna samajhna zaroori hai:๐Ÿ” SSH humein allow karta hai ki hum remotely kisi doosri device pe commands execute kar saken.
๐ŸŒ Jab bhi do devices ke beech data bheja jata hai (internet ya kisi network ke through), woh encrypted hota hai โ€” yaani secure form mein send hota hai.

๐Ÿš€ Deploying Your Linux Machine

  1. Neeche diye gaye green “Start Machine” button pe click karo.
  2. Uske baad page ke top pe scroll karo โ€” wahan tumhe machine ka deployment info milega, kuch is screenshot ke jaisa.

Aage badhne se pehle ensure karo ki machine properly deploy ho gayi ho โ€” agar kuch dikhe ya error aaye, toh mujhe batao!
ย 

๐Ÿ’ป Tumhari Linux Machine ka IP Address
Jo IP address display ho raha hai, woh tumhari Linux machine ka address hai โ€” jisme tum SSH ka use karke login karoge.
Abhi ke liye is IP address ko note kar lo, aage kaam aayega.
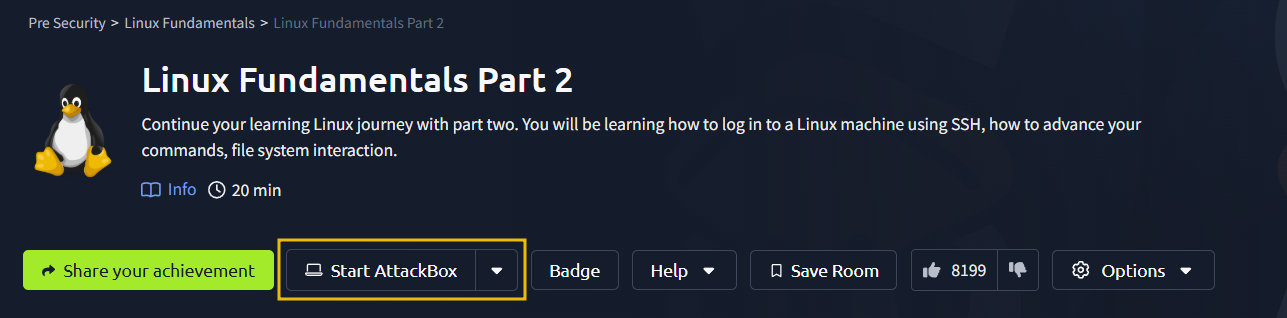

๐Ÿš€ TryHackMe AttackBox ko Deploy Karna

Page ke top pe dekho, wahan “Start AttackBox” button dikh raha hoga โ€” uspe click karke TryHackMe AttackBox deploy karo.TryHackMe AttackBox ek Ubuntu Linux machine hai jo cloud mein host ki gayi hoti hai. Tum ise directly apne browser se access aur use kar sakte ho.Is task mein tum isi AttackBox ka use karke apni deployed Linux machine se interact karoge (via SSH).
Ready ho jao remote access karne ke liye โ€” jab dono machines chal rahi ho, toh batao aur agla step start karte hain!SSH ka use karke apni Linux Machine me Login karna
SSH use karna kaafi simple hota hai. Humein sirf do cheezen chahiye hoti hain:
  1. Remote machine ka IP address
  2. Ek valid user account ke correct credentials (username & password)
Is room ke liye, hum "tryhackme" user ke through login karenge, jiska password bhi "tryhackme" hai (quotation marks ke bina).

SSH Command ka Syntax:

SSH se login karne ke liye hum command likhte hain:
ย 
ssh username@IP_address
Toh is case me:
ย 
ssh tryhackme@MACHINE_IP
Yahan MACHINE_IP ko apni Linux target machine ke IP address se replace karna hai (jo room ke top card me diya hota hai).

Steps:

  1. TryHackMe AttackBox me desktop pe ek icon hoga “Terminal” ke naam se โ€” usko open karo.
  2. Terminal me upar wali SSH command type karo.
  3. Pehli baar connect karte waqt system aapse host pe trust karne ka prompt maangega โ€” type karo yes.
  4. Fir aapse password maanga jayega โ€” yahan password hoga tryhackme.

Itna karne ke baad aap successfully remote Linux machine me login kar jaoge using SSH.

Aadhi commands allow karti hain arguments dene ke liye. Ye arguments hyphen (-) aur ek keyword ke saath identify hote hain, jise flags ya switches kehte hain.

Baad mein hum discuss karenge ki kaise pata karein ki kaunse commands arguments allow karte hain aur unka exact matlab kya hota hai.

Jab command use karte hain, agar kuch alag specify nahi kiya hota, toh wo apna default behaviour perform karta hai. Jaise, ls command working directory ke contents list karta hai. Lekin hidden files show nahi karta. Hum flags aur switches use karke commands ka behaviour extend kar sakte hain.

ls example lein, toh ls humein sirf ek folder โ€œfolder1โ€ dikhata hai jaise screenshot mein highlight hai. Dhyan dein ki screenshots mein jo contents hain, wo sirf examples hain.

Directory ke contents dekhne ke liye ls use karna:

tryhackme@linux2:~$ ls
folder1
tryhackme@linux2:~$

Lekin agar hum -a argument (jo --all ka short form hai) use karte hain, toh output mein kuch aur files aur folders aa jaate hain, jaise .hiddenfolder. Jo files aur folders . se start hote hain, wo hidden hote hain.

Hidden folders dekhne ke liye ls -a use karna:

tryhackme@linux2:~$ ls -a
.hiddenfolder folder1
tryhackme@linux2:~$

Jo commands arguments accept karte hain, unmein --help option bhi hota hai. Ye option possible options list karta hai, unka chhota description deta hai aur example bhi show karta hai ki kaise use karna hai.

ls ke options dekhne ke liye:

tryhackme@linux2:~$ ls –help
Usage: ls [OPTION]… [FILE]…
List information about the FILEs (the current directory by default).
Sort entries alphabetically if none of -cftuvSUX nor –sort is specified.

Mandatory arguments to long options are mandatory for short options too.
-a, –all do not ignore entries starting with .
-A, –almost-all do not list implied . and ..
–author with -l, print the author of each file
-b, –escape print C-style escapes for nongraphic characters
–block-size=SIZE with -l, scale sizes by SIZE when printing them;
e.g., ‘–block-size=M’; see SIZE format below
-B, –ignore-backups do not list implied entries ending with ~
-c with -lt: sort by, and show, ctime (time of last
modification of file status information);
with -l: show ctime and sort by name;
otherwise: sort by ctime, newest first
-C list entries by columns
–color[=WHEN] colorize the output; WHEN can be ‘always’ (default
if omitted), ‘auto’, or ‘never’; more info below
-d, –directory list directories themselves, not their contents
-D, –dired generate output designed for Emacs’ dired mode
-f do not sort, enable -aU, disable -ls –color
-F, –classify append indicator (one of */=>@|) to entries
–file-type likewise, except do not append ‘*’
–format=WORD across -x, commas -m, horizontal -x, long -l,
single-column -1, verbose -l, vertical -C
–full-time like -l –time-style=full-iso
-g like -l, but do not list owner
–group-directories-first
tryhackme@linux2:~$

Ye option asal mein ek formatted output hai jo man page kehlaata hai (manual ka short form), jisme Linux commands aur applications ka documentation hota hai.


The Man(ual) Page

Manual pages ek bahut achha source hain information ke liye, dono system commands aur applications ke liye, jo Linux machine par ya online available hoti hain.

Is documentation ko access karne ke liye hum man command use karte hain aur uske baad command ka naam dete hain jiska documentation dekhna hota hai. Jaise ls ke liye:

tryhackme@linux2:~$ man ls

Iss se ls ke manual pages khulte hain, jo kuch is tarah dikhenge:

ย 

LS(1) User Commands LS(1)

NAME
ls – list directory contents

SYNOPSIS
ls [OPTION]… [FILE]…

DESCRIPTION
List information about the FILEs (the current directory by default). Sort entries alphabetically if none of
-cftuvSUX nor –sort is specified.

Mandatory arguments to long options are mandatory for short options too.

-a, –all
do not ignore entries starting with .

-A, –almost-all
do not list implied . and ..

–author
with -l, print the author of each file

-b, –escape
print C-style escapes for nongraphic characters

–block-size=SIZE
with -l, scale sizes by SIZE when printing them; e.g., ‘–block-size=M’; see SIZE format below


Questions ke answers:

    • Manual page mein neeche jaane ke liye kaunsa arrow key use karte hain?
      โ†’ Down arrow key

    • Human-readable output dikhane ke liye kaunsa flag use karenge?
      โ†’ -h

Humne Linux filesystem ke saath interact karne ke liye kuch fundamental commands cover kiye hain. Jaise ki folders ke contents ko list aur find karna ls aur find commands se, aur filesystem mein navigate karna cd se.

Is task mein, hum kuch aur commands seekhenge jisse hum filesystem ke saath zyada interact kar sakte hain, jaise ki:

    • Files aur folders create karna

    • Files aur folders move karna

    • Files aur folders delete karna

Specifically, ye commands hain:

CommandFull NamePurpose
touchtouchFile create karna
mkdirmake directoryFolder create karna
cpcopyFile ya folder copy karna
mvmoveFile ya folder move karna
rmremoveFile ya folder delete karna
filefileFile ka type batana

Protip: Bilkul cat ki tarah, hum full file paths bhi de sakte hain, jaise directory1/directory2/note in sab commands mein.


Files aur Folders Create karna (touch, mkdir)

Linux mein files aur folders banana bahut simple hai. Pehle hum file create karna dekhenge. touch command ko ek hi argument chahiye hota hai โ€” wo naam jo aap file ko dena chahte hain. Jaise agar file โ€œnoteโ€ banana hai, toh command hogi:

touch note

Yeh sirf ek blank file banata hai. File mein content add karne ke liye aapko echo ya text editors jaise nano use karna padega.

Example:

tryhackme@linux2:~$ touch note
tryhackme@linux2:~$ ls
folder1 note

Folders create karne ka process bhi similar hai, bas mkdir command use karte hain aur folder ka naam dete hain. Jaise:

mkdir mydirectory

Example:

tryhackme@linux2:~$ mkdir
mydirectory
tryhackme@linux2:~$ ls
folder1 mydirectory note

Files aur Folders Delete karna (rm)

rm command ab tak ke sabse powerful commands mein se hai. Simple files ko delete karne ke liye:

rm note

Lekin agar directory delete karni hai, toh -R (recursive) flag ke saath dena hota hai:

rm -R mydirectory

Example:

tryhackme@linux2:~$ rm note
tryhackme@linux2:~$ ls
folder1 mydirectory
tryhackme@linux2:~$ rm -R mydirectory
tryhackme@linux2:~$ ls
folder1

Files aur Folders Copy aur Move karna (cp, mv)

Copy aur move karna Linux mein bahut zaroori hai. cp command do arguments leta hai:

    1. Existing file ka naam

    2. Nayi file ka naam jo copy ke time assign karna hai

cp pura content copy karta hai.

Example:

tryhackme@linux2:~$ cp note note2
tryhackme@linux2:~$ ls |
folder1 note note2

mv command bhi do arguments leta hai, lekin ye file ko move karta hai ya rename karta hai. Jaise:

mv note2 note3

Iska matlab hai note2 ko note3 naam de diya, aur note3 mein note2 ka content aajayega.

Example:

tryhackme@linux2:~$ mv note2 note3
tryhackme@linux2:~$ ls
folder1 note note3

File Type Determine karna (file)

Kabhi kabhi files ke naam se unka purpose samajh mein nahi aata, especially agar file extension na ho. Jaise .txt hota hai text files ke liye, lekin har file mein extension nahi hota.

Isliye file command use karte hain, jo ek argument leta hai โ€” file ka naam โ€” aur batata hai file ka type kya hai.

Example:

tryhackme@linux2:~$ file note
note: ASCII text

Questions ke answers:

Q: File “newnote” kaise create karoge?
A: touch newnote

Q: Deployable machine mein “tryhackme” ke home directory mein “unknown1” file ka type kya hai?
A: ASCII text

Q: File “myfile” ko “myfolder” directory mein kaise move karoge?
A: mv myfile myfolder

Q: File ke contents kya hain?
A: THM{FILESYSTEM}

Ab tak aapne shayad notice kiya hoga ki kuch users ko kuch specific files ya folders ka access nahi milta. Pehle ke tasks mein humne kuch commands seekhi thi jinke through hum check kar sakte hain ki kahan access hai aur kahan nahi.

๐Ÿ“‚ ls -l Command Ka Use

Jab hum ls -l command use karte hain, toh wo directory ke saare files ka detailed list dikhata hai. Example:

tryhackme@linux2:~$ ls -lh
-rw-r--r-- 1 cmnatic cmnatic 0 Feb 19 10:37 file1
-rw-r--r-- 8 cmnatic cmnatic 0 Feb 19 10:37 file2

Yahan pe pehle teen columns important hain:

    1. Permissions (-rw-r--r--)

    2. Owner (e.g., cmnatic)

    3. Group (e.g., cmnatic)

Ye permissions batate hain ki file ya folder ko kaun read, write, ya execute kar sakta hai.

๐Ÿ‘ฅ Users vs Groups

Linux mein ek file ke owner ke alawa, ek group bhi us file ke liye different permissions rakh sakta hai. Matlab, ek user file ka malik ho sakta hai, lekin group ke members ko bhi read ya write ka right mil sakta hai.

Example: Web hosting company ka server user ko access chahiye hota hai files ka. Lekin har customer ko bhi unke files upload karne ka option milta hai without unhe full access diye.


๐Ÿ”„ Switching Between Users

Linux mein dusre user mein switch karne ke liye su command use hoti hai.

๐Ÿ”‘ Zaroori cheezein:

    • Jis user mein switch karna hai, uska username

    • Uska password

๐Ÿ‘‡ Commands:

Simple switch:

su user2

Switch with full login environment (recommended):

su -l user2

Isse aap directly us user ke home directory mein chale jaate ho.

Example:

tryhackme@linux2:~$ su -l user2
Password: user2
@linux2:~$ pwd /home/user2

โ“ QUESTIONS & ANSWERS

    1. On the deployable machine, who is the owner of “important”?

      ๐Ÿ‘‰ Command to check:

      ย 
      ls -l important

      Ye aapko file ka owner dikhayega (usually 3rd column). Answer yahan se mil jayega.

      Answer example (agar output ho):

      ย 
      cmnatic
    2. What would the command be to switch to the user “user2”?

      ๐Ÿ‘‰ Command:

      ย 
      su -l user2
    3. Now switch to this user “user2” using the password “user2”

      โœ… Bas ye command run karo:

      ย 
      su -l user2

      Fir password type karo: user2

    4. Output the contents of “important”, what is the flag?

      ๐Ÿ‘‰ Once switched to user2, run:

      ย 
      cat important

      Ye file ka content dikhayega. Usme jo text flag jaisa dikhe, wahi answer hai (e.g., THM{example_flag}).

๐Ÿ“‚ Linux Ke Kuch Important Root Directories

๐Ÿ”น /etc โ€” Configuration Files

    • Yeh folder Linux ka system settings center hota hai.

    • Isme important configuration files hoti hain jaise:

      • sudoers โ†’ bataata hai kaun user sudo command chala sakta hai.

      • passwd โ†’ sabhi users ki info store karta hai.

      • shadow โ†’ users ke encrypted passwords store karta hai (sha512 format mein).


๐Ÿ”น /var โ€” Variable Data

    • “var” ka matlab variable hota hai.

    • Yahan pe system aur services ke log files, databases, etc. store hote hain.

    • Example: /var/log mein sabhi logs jaate hain.


๐Ÿ”น /root โ€” Root User ka Ghar

    • Yeh root user ki home directory hoti hai.

    • Logically lagta hai jaise /home/root hona chahiye, lekin actual mein wo /root hoti hai.


๐Ÿ”น /tmp โ€” Temporary Data

    • Short for “temporary”.

    • Yahan pe temporary files store hote hain.

    • Jab bhi system restart hota hai, is folder ka saara data delete ho jaata hai (jaise RAM).

    • Sabhi users isme write kar sakte hain โ€” pentesting ke liye useful hota hai.


โœ… ANSWERS:

    1. What is the directory path that we expect logs to be stored in?
      Answer: ย /var/log

    2. What root directory is similar to how RAM on a computer works?
      Answer: ย ย /tmp

    3. Name the home directory of the root user
      Answer: ย ย /root

๐Ÿ“Š Linux Root Directory Structureย 

Directory PathNaam ka MatlabPurpose (Kya karta hai?)Common Files/Folders InsideNotes
/RootSystem ka root directory hai, sab kuch yahin se start hota haisabhi subdirectories (jaise /etc, /home, etc.)Iske andar saari directories hoti hain
/etcetceteraSystem config files store karta haipasswd, shadow, sudoers, hosts, hostnameSystem settings aur user info yahin hoti hai
/varVariableLogs aur changing data store karta hailog/, backups/, tmp/, opt/Services ke logs aur other dynamic data
/homeHomeNormal users ki personal directoriesuser1/, user2/Har user ka apna personal space
/rootRoot ka homeRoot user ki home directorymyfile, myfolder, passwords.xlsxOnly root user ka access
/tmpTemporaryTemporary files store karta haitrash.txt, rubbish.bin, etc.System restart hone par sab delete ho jaata hai
/binBinariesBasic Linux commands like ls, cat, etc.ls, bash, cp, mv, etc.System boot hone ke liye required
/sbinSystem BinariesSystem-level commands (mostly admin use)ifconfig, reboot, iptablesMostly root ya sudo users ke liye
/usrUser ProgramsApplications aur unke librariesbin/, lib/, share/User-installed software ka base
/libLibrariesSystem libraries (DLL type)libc.so, ld-linux.so, etc.Programs ke run karne ke liye
/optOptional3rd-party software yahan install hota haisoftware foldersE.g., Google Chrome, VS Code
/mediaMedia DevicesAuto-mounted external media (USB, CD, etc.)usb0, cdromJab pen-drive lagate ho toh yahin mount hoti hai
/mntMountManual mounting ke liye temporary folderEmpty until usedManually mount ki gayi devices ke liye
/devDevicesSystem hardware ko file format mein dikhata haisda, tty, nullDevices as files (important for system interaction)
/procProcessesSystem processes aur kernel infocpuinfo, meminfo, etc.Virtual folder, runtime info deta hai
/sysSystemHardware and kernel ke info ko expose karta haiDevice trees, power info, etc.Kernel aur hardware ka bridge
/bootBoot LoaderSystem boot hone ke liye zaroori filesvmlinuz, initrd.img, grub/OS boot hone se pehle ye files load hoti hain
/runRuntime DataBoot time aur current sessions ke liye dataPID files, socketsBoot ke time temporary files

๐Ÿ”‘ Short Summary (Memory Trick):

  • Config files? โ†’ /etc

  • Logs and variable data? โ†’ /var

  • User folders? โ†’ /home

  • Root user home? โ†’ /root

  • Temporary files? โ†’ /tmp

  • System commands? โ†’ /bin and /sbin

  • User-installed programs? โ†’ /usr and /opt

  • Devices? โ†’ /dev

  • Boot files? โ†’ /boot

Nice kaam kiya! Yeh room thoda theory-heavy tha aur Linux ke basics ko achhi tarah samjhane ke liye kaafi topics cover kiye. Jaldi se recap karte hain, is room ne aapko ye sikhaya:

    • Kaise aap remote Linux machine se SSH ke through connect kar sakte ho

    • Commands ko kaise aage badhayein using flags aur switches, aur kaise har command ke baare mein detail mein man pages se seekh sakte ho

    • Kuch aur important commands jo aapko frequently use karne padenge files aur folders ke saath interact karne ke liye

    • Ek chhota introduction diya gaya tha file permissions aur users switch karne ke baare mein

    • Ubuntu Linux system ke important root directories ka ek summary, aur kaise wahan stored data ka use kar sakte hain

ย Is room ko ek do baar dubara dekho taaki concepts achhi tarah samajh mein aaye. Kyunki practice se hi perfection aata hai!ย  Part 3

error: Content is protected !!